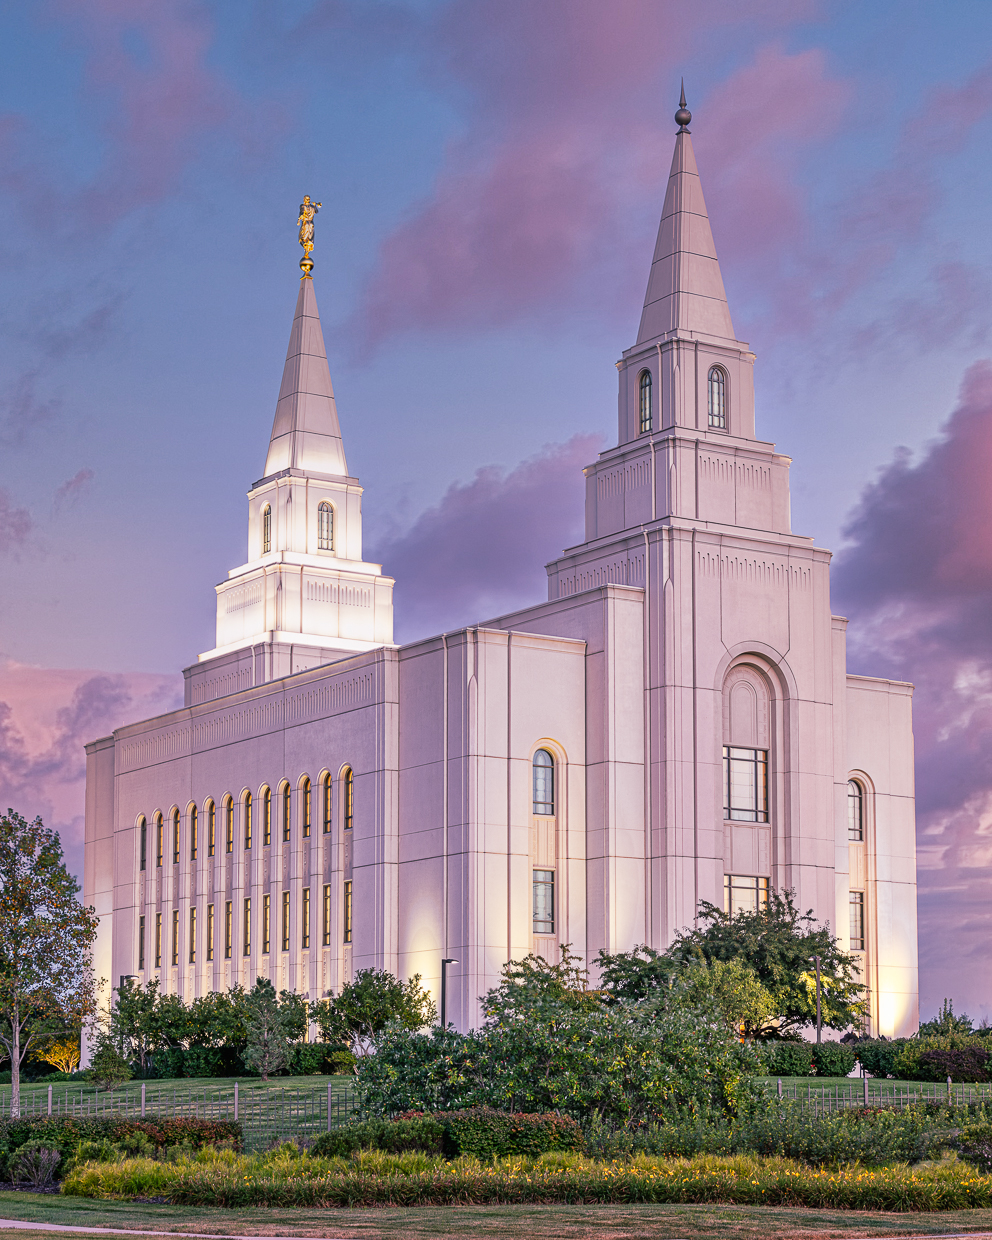
This is a return visit photo. I was here the previous evening to capture the supermoon. I had elected to come back to see if I could get some other images. While I was waiting for the moon to come up, I took several photographs as the sun was setting. I remembered how nice this shooting location was in capturing the architecture of the building, even though it was on the backside angle of the temple. I also remember how I liked how the landscape and interior lights were accenting the temple.
What I was interested in capturing was an image right at the transition from the golden hour to the blue hour. I was attempting to retain enough light to capture the detail with the shrubbery and building, but also catch the lighting enhancing the temple. To get it right, I used five photos to build this high dynamic range image. The exposure settings of these five images was 2 sec, 2.5 sec, 3.2 sec, 5 sec, and 6 sec. These five images were auto-aligned, then auto-blended in Photoshop and returned back to Lightroom. This composite image allowed me to balance the dynamic range as shown in the below composite image histogram compared to the other five individual images.

Once back in to Lightroom, I liked how the histogram was showing me a greater tonal range compared to the individual shots that had a few dominate color spikes. I also liked that I wasn’t clipping the shadows or brightness. However, I knew that landscaping lighting on the main steeple would skew the histogram to the right (see the composite histogram) and increase the brightness value as shown in the composite image at 2.19. Because I was shooting in manual mode and it was during the onset of the blue hour, I was adding some exposure compensation into each of these photos used in the composite image. Lightroom shows that this averaged out to 1.3 EV for the Exposure Bias. This image at this point looked as shown below.

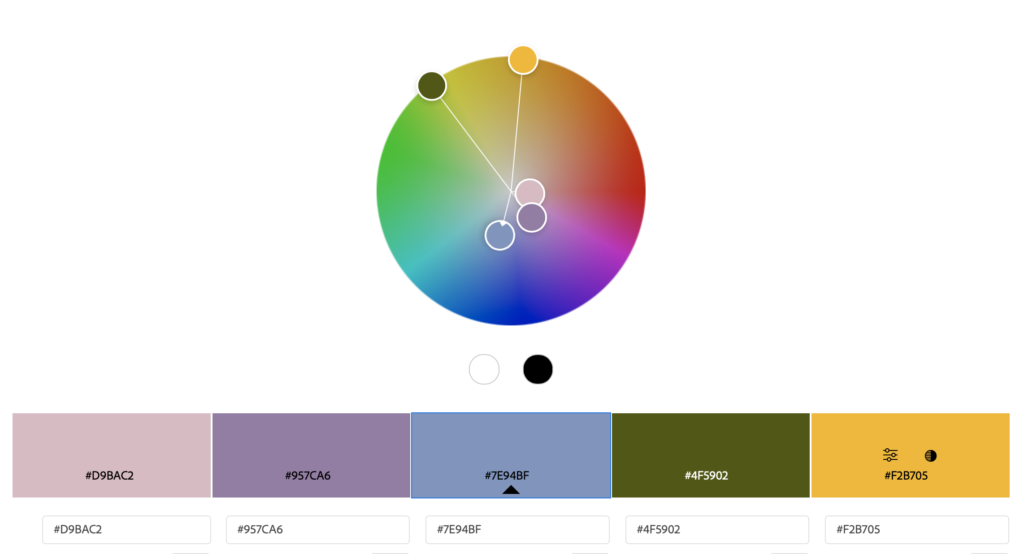
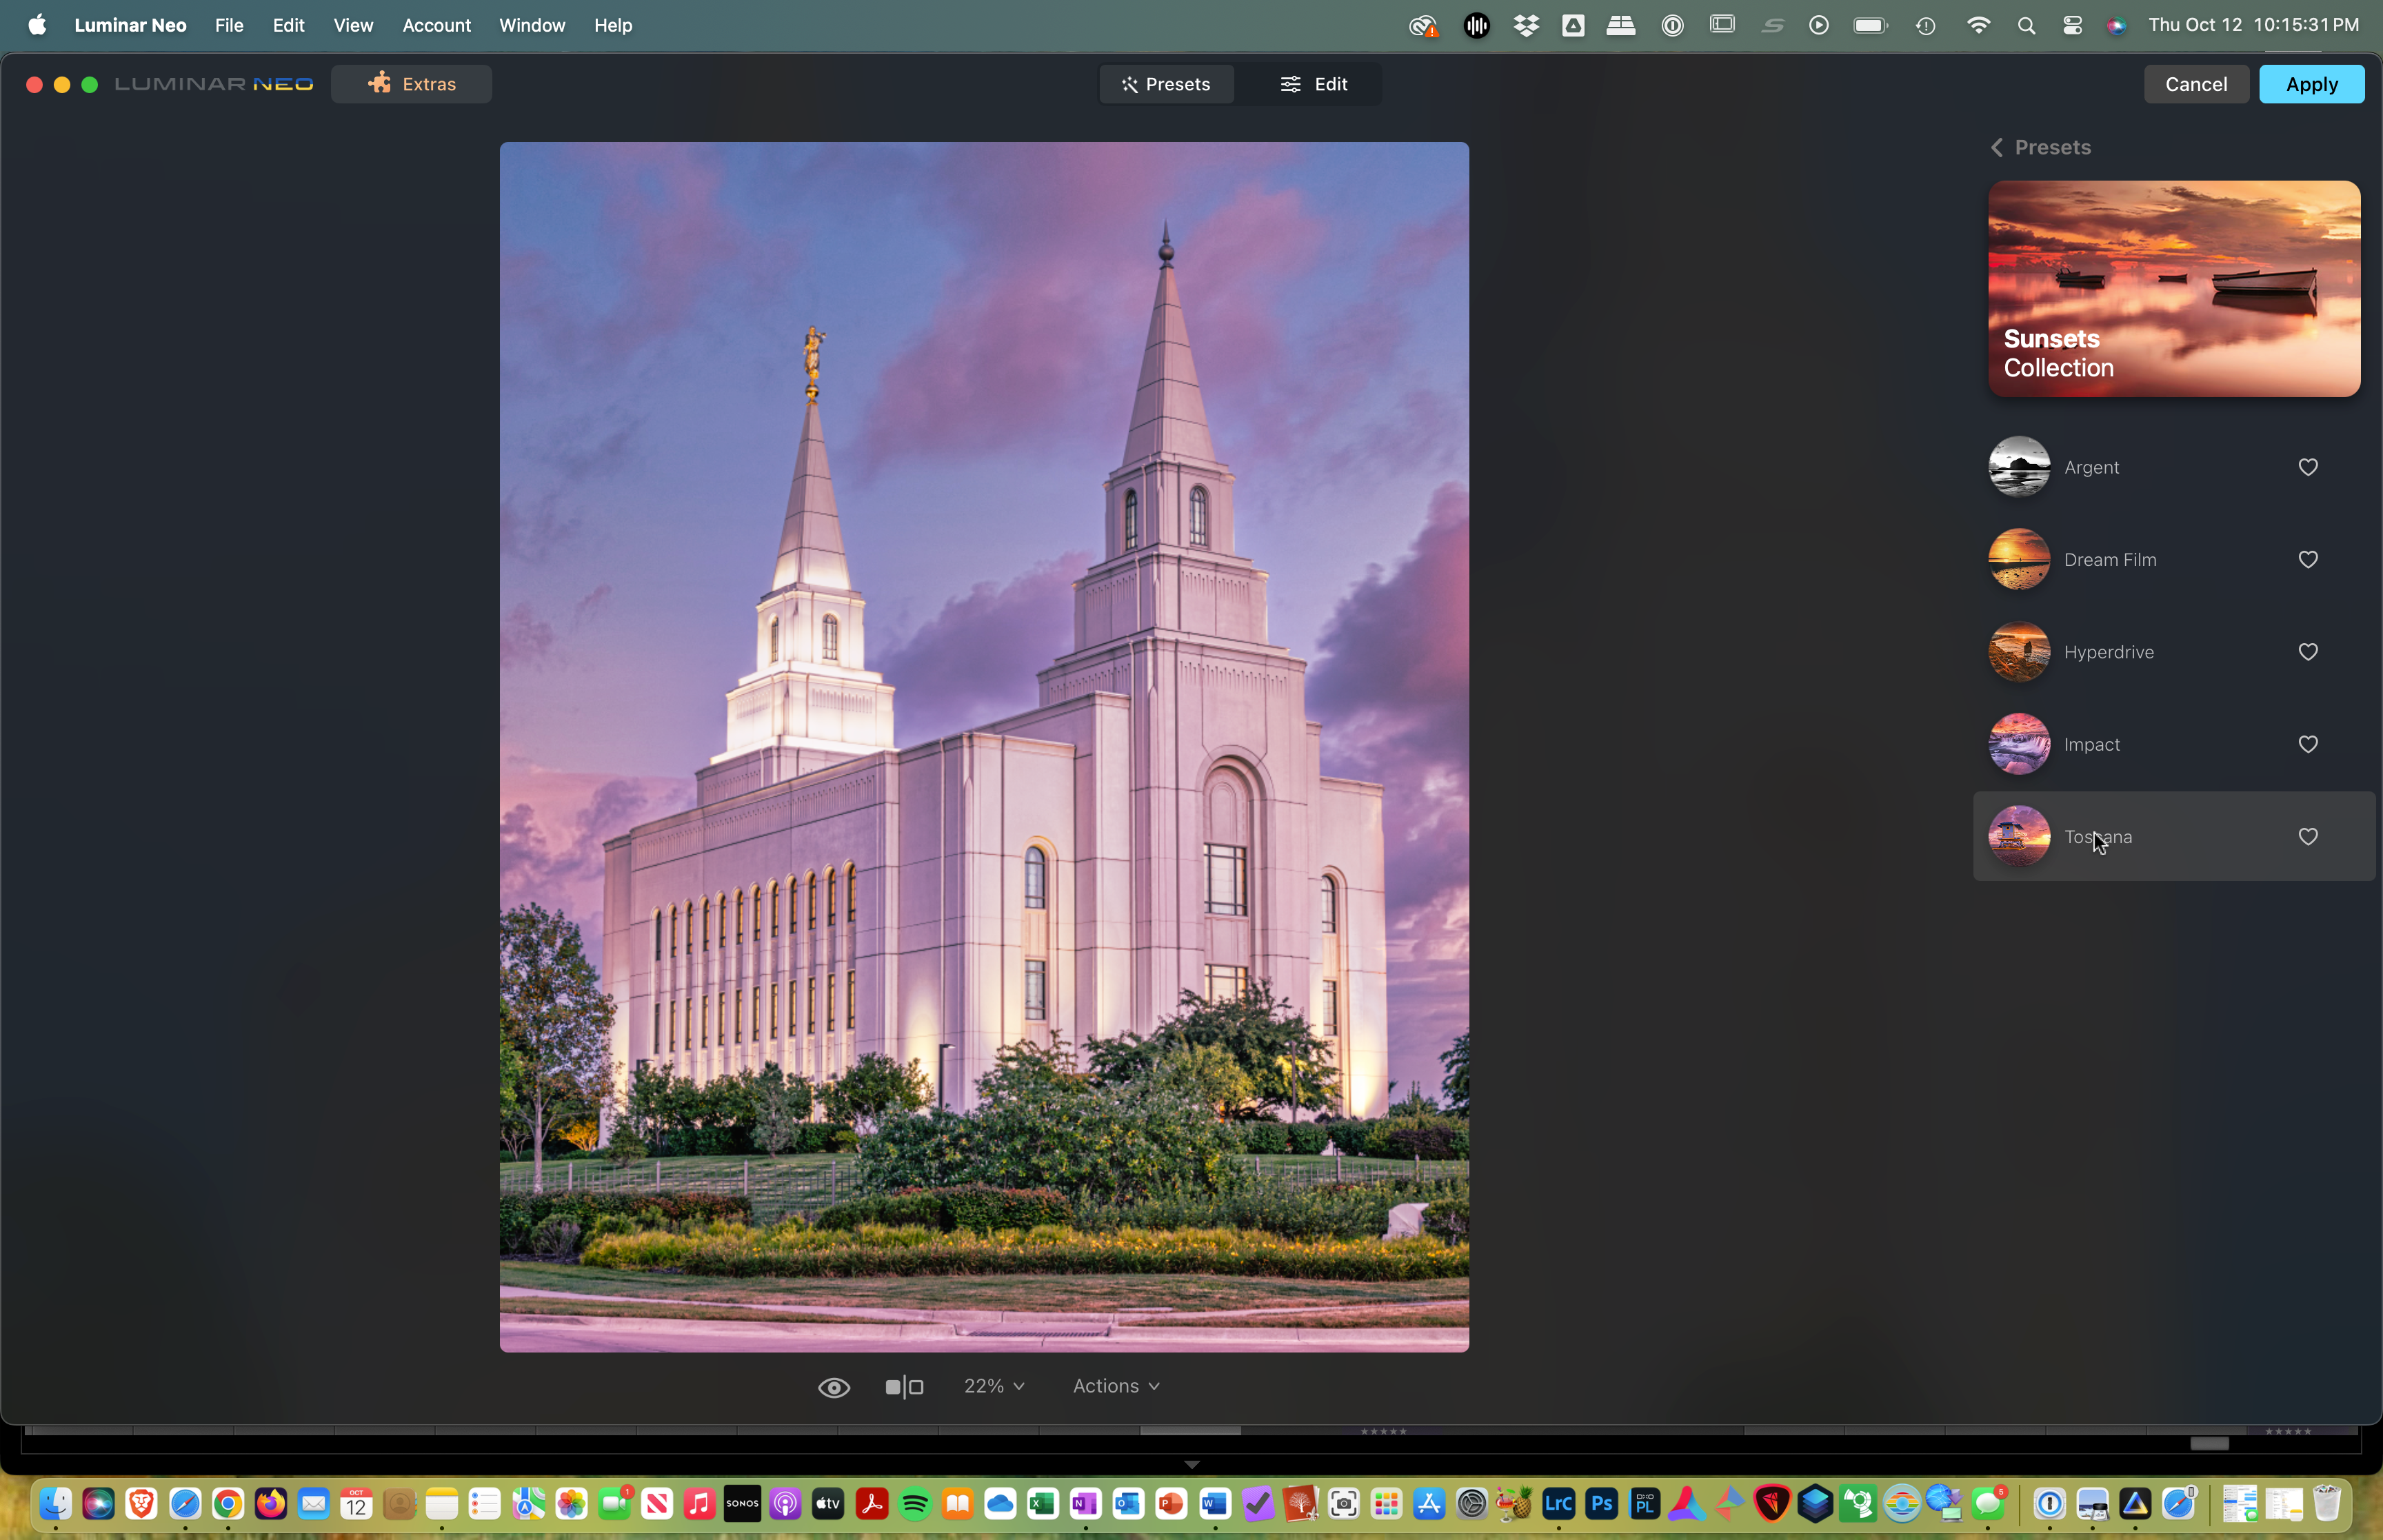
I thought that it was a pleasing photo, but was missing some punch. So I thought, why not try out Luminar Neo and see what that post processing software recommended. I reasoned that this might be a good photo to evaluate the artificial intelligence that Luminar Neo was suppose to have. So I did the right clip in Lightroom and chose Edit In Luminar Neo. When it opened, my version of Luminar Neo came with a Sunsets Preset that was part of their Landscape Presets. When Luminar Neo opened the photo within the Sunset Collection, I thumbed through the five presets within this collection and selected the Tuscana Preset because it offered me that punch I was looking for. So I selected it and then adjusted down the intensity of the effect, because I was sensing that it looked too much like the less popular HDR look. However, I liked the outcome and applied the effect, but felt that I needed to reveal what I did. Reasoning that with the clouds not there, this was a more artistic impression verses the actual scenic conditions. However, it is pretty cool, don’t you think! And to think the outcome only required me to lower the intensity of the preset. Luminar Neo did the sky replacement and added the lavender tone to the building. There may of been some other less notable adjustments made, but my amateur eye couldn’t tell. Except till I dropped it into Adobe Color to extract the color theme pallet and found that the adjustments resulted in a split complementary color theme (see the two output charts below. What I did learn from this little experiment is that Luminar Neo has some nice capabilities that could really help someone that is wanting a fast and easy post-processing application. The only potential concern here is that you are locked into their provided add-on and the pricing they charge to expand the applications processing flexibilities.
|
Picture Info
|
|---|
 August 31, 2023
|
 7:16 PM
|
|
EXIF
|
|---|
 Sony ILCE-7RM5
|
 FE 24-240 mm
|
 54 mm
54 mm
|
 f/10
f/10
|
|
|
 2 sec
2 sec
|
 No Flash
|